- Version 2022.03.22 (2.2 MB .xlsm file) for burned and unburned conditions & PEP – Windows 10 and Excel 2016-compatible with rock % import
- Version 2018.04.01 (2.2 MB .xlsm file) for burned and unburned conditions & PEP – Windows 10 and Excel 2016-compatible
- Version 2017.02.03 (2.4 MB .xls file) for burned and unburned conditions & PEP
Some hillslopes, especially for unburned conditions, produce a truncated ERMiT results page, which creates an "Error 5" and halts the batch run.
We are working on making the spreadsheet more robust.
This spreadsheet is designed to make running multiple ERMiT scenarios much more efficient. The spreadsheet interface is downloaded and run on one's PC, but the ERMiT model runs are on our server.
Requirements
- Microsoft Excel version 2016 or newer (365 highly preferred)
- An internet Connection
Optional
- The Hillslope Delineation Toolbox, an ArcInfo .tbx file that one downloads and installs on one's PC. It can assist in collecting input values for the Disturbed WEPP Batch or Batch ERMiT interface spreadsheets.
These workbooks require Macros and ActiveX to load the input data and query wepp runs. Below are two options to enable macros. We recommend using Option 1 if you have the necessary permissions to modify your Internet Options security settings. However, if you have a government computer, you might not have this capability, and you'll need to proceed with Option 2 or Option 3.
Option 1: Add to Trusted Sites
This method involves adding forest.moscowfsl.wsu.edu to your list of trusted sites through the Internet Options.
- Open the Control Panel on your computer.
- Select Network and Internet.
- Select Internet Options.
- Click on the Security tab.
- Select Trusted Sites (it has a green check mark icon).
- Click on the Sites button.
- Under "Add this website to the zone:", enter
forest.moscowfsl.wsu.eduand click Add. - Click Close and then OK.
Option 2: Add a Trusted Location through Excel's Trust Center
If you can't modify your Internet Options security settings, follow these steps to add a Trusted Location through Excel:
- Open Microsoft Excel.
- Click on the File tab located at the top-left corner.
- Choose Options from the menu list.
- In the Excel Options window, select Trust Center from the list on the left.
- Click on the Trust Center Settings... button.
- Choose Trusted Locations from the list on the left.
- Click on the Add new location... button.
- Browse and select the location where your Excel tool is saved.
- Ensure the "Subfolders of this location are also trusted" option is checked if you want to trust all subfolders within the chosen location.
- Click OK to confirm and add the location.
- Click OK again to close the Trust Center Settings.
- Finally, click OK to close the Excel Options window.
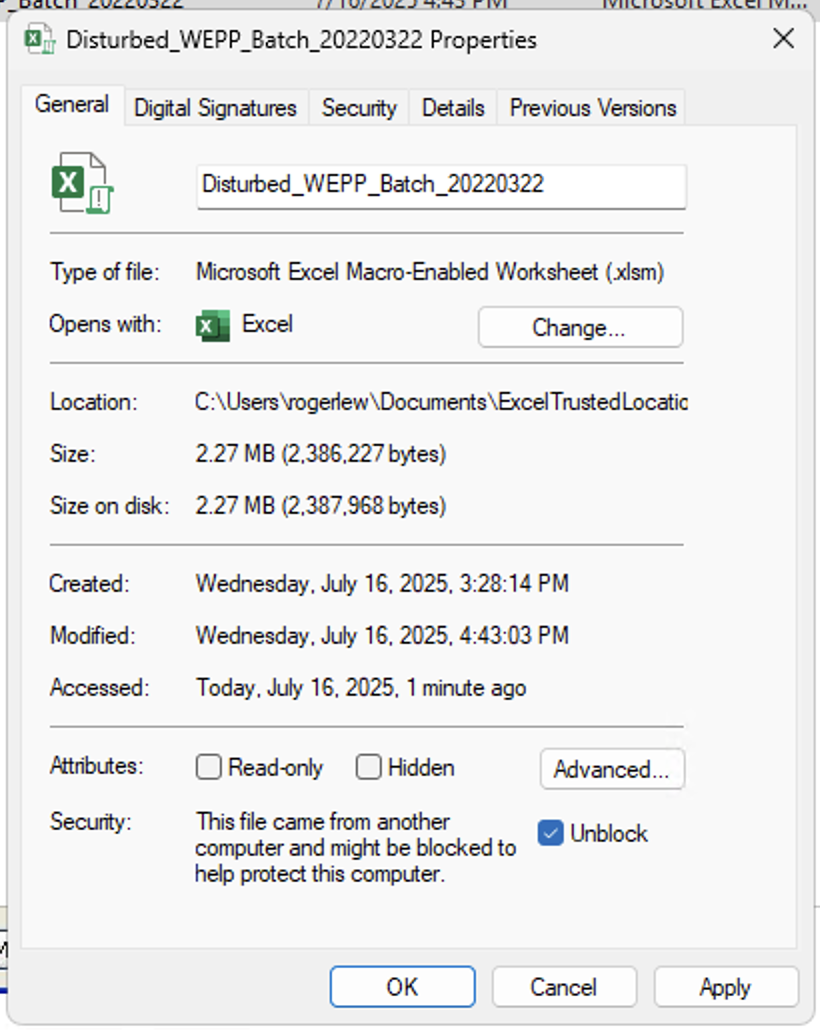
Option 3: Unblock the worksheet
Set Unblock for the worksheet:
- Right-click the file in Explorer and click Properties
- In the Properties window, select Unblock under the Security section of the General Tab.
Enabling ActiveX Controls in Excel's Trust Center
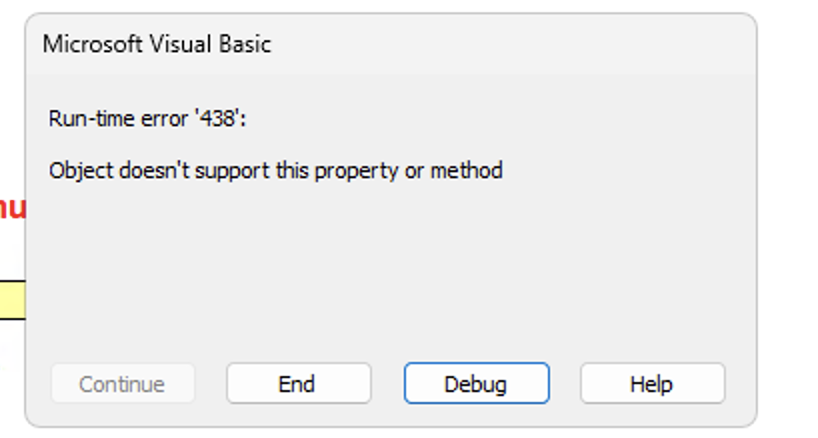
If you encounter a Run-time error '438': Object doesn't support this property or method when using the WEPP Batch Tool, it may be due to Excel blocking ActiveX controls. Follow the steps below to fix this:
Step 1: Understand the Error
You might see this error message when Excel prevents ActiveX from initializing:
Step 2: Change ActiveX Settings in the Trust Center
- Open Microsoft Excel.
- Click the File tab in the top-left corner.
- Select Options.
- In the Excel Options window, click Trust Center from the list on the left.
- Click the Trust Center Settings… button.
- Choose ActiveX Settings from the left pane.
- Select the option: Prompt me before enabling all controls with minimal restrictions.
- Make sure Safe mode is also checked.
- Click OK to apply the changes and close the dialogs.
The correct configuration should look like this:

Once you've updated these settings, close and reopen the Excel workbook. If prompted, allow macros and ActiveX content to run.
Hints
- View –> Full Screen to display (more of) the entry fields (right-click on spreadsheet border and Restore to get menus back)
- Use the zoom tool
- Hillslope horizontal length limit is 1,000 feet (300 meters) in the interface
- Keep a clean version of the interface spreadsheet, and make a copy for each project – save it under a different name before running the batch, and again after to save the results.
- Some hillslopes, especially for unburned conditions, produce a truncated ERMiT results page, which creates an "Error 5" and halts the batch run. We are working on making the spreadsheet more robust.
Send us comments
